Руководство для начинающих
| Запуск, остановка, перезагрузка конфигурации Структура конфигурационного файла Раздача статического содержимого Настройка простого прокси-сервера Настройка проксирования FastCGI |
В этом руководстве даётся начальное введение в nginx и описываются некоторые простые задачи, которые могут быть решены с его помощью. Предполагается, что nginx уже установлен на компьютере читателя. Если нет, см. Установка nginx. В этом руководстве описывается, как запустить и остановить nginx и перезагрузить его конфигурацию, объясняется, как устроен конфигурационный файл, и описывается, как настроить nginx для раздачи статического содержимого, как настроить прокси-сервер на nginx, и как связать nginx с приложением FastCGI.
У nginx есть один главный и несколько рабочих процессов.
Основная задача главного процесса — чтение и проверка конфигурации
и управление рабочими процессами.
Рабочие процессы выполняют фактическую обработку запросов.
Как работают nginx и его модули, определяется в конфигурационном файле.
По умолчанию, конфигурационный файл называется nginx.conf и расположен в каталоге /usr/local/nginx/conf, /etc/nginx или /usr/local/etc/nginx.
Запуск, остановка, перезагрузка конфигурации
Чтобы запустить nginx, нужно выполнить исполняемый файл.
Когда nginx запущен, им можно управлять, вызывая исполняемый файл с
параметром
nginx -s сигнал
Где сигнал может быть одним из нижеследующих:
-
stop— быстрое завершение -
quit— плавное завершение -
reload— перезагрузка конфигурационного файла -
reopen— переоткрытие лог-файлов
Например, чтобы остановить процессы nginx с ожиданием окончания обслуживания текущих запросов рабочими процессами, можно выполнить следующую команду:
nginx -s quit
Команда должна быть выполнена под тем же пользователем, под которым был запущен nginx.

Изменения, сделанные в конфигурационном файле, не будут применены, пока команда перезагрузить конфигурацию не будет вручную отправлена nginx’у или он не будет перезапущен. Для перезагрузки конфигурации выполните:
nginx -s reload
Получив сигнал, главный процесс проверяет правильность синтаксиса нового конфигурационного файла и пытается применить конфигурацию, содержащуюся в нём. Если это ему удаётся, главный процесс запускает новые рабочие процессы и отправляет сообщения старым рабочим процессам с требованием завершиться. В противном случае, главный процесс откатывает изменения и продолжает работать со старой конфигурацией. Старые рабочие процессы, получив команду завершиться, прекращают принимать новые запросы и продолжают обслуживать текущие запросы до тех пор, пока все такие запросы не будут обслужены. После этого старые рабочие процессы завершаются.
Посылать сигналы процессам nginx можно также средствами Unix,
такими как утилита kill.![]() В этом случае сигнал отправляется напрямую процессу с данным ID.
ID главного процесса nginx записывается по умолчанию в файл
В этом случае сигнал отправляется напрямую процессу с данным ID.
ID главного процесса nginx записывается по умолчанию в файл /usr/local/nginx/logs или /var/run.
Например, если ID главного процесса равен 1628, для отправки сигнала QUIT,
который приведёт к плавному завершению nginx, нужно выполнить:
kill -s QUIT 1628
Для просмотра списка всех запущенных процессов nginx может быть использована
утилита ps, например, следующим образом:
ps -ax | grep nginx
Дополнительную информацию об отправке сигналов процессам nginx можно найти в Управление nginx.
Структура конфигурационного файла
nginx состоит из модулей, которые настраиваются директивами, указанными
в конфигурационном файле.
Директивы делятся на простые и блочные.
Простая директива состоит из имени и параметров, разделённых пробелами,
и оканчивается точкой с запятой ( Блочная директива устроена так же, как и простая директива, но
вместо точки с запятой после имени и параметров следует набор дополнительных
инструкций, помещённых внутри фигурных скобок
(
Блочная директива устроена так же, как и простая директива, но
вместо точки с запятой после имени и параметров следует набор дополнительных
инструкций, помещённых внутри фигурных скобок
({ и }).
Если у блочной директивы внутри фигурных скобок можно задавать другие
директивы, то она называется контекстом (примеры:
events,
http,
server
и
location).
Директивы, помещённые в конфигурационном файле вне любого контекста,
считаются находящимися в контексте
main.
Директивы http располагаются в контексте main, server —
в http, а location — в server.
Часть строки после символа # считается комментарием.
Раздача статического содержимого
Одна из важных задач конфигурации nginx — раздача
файлов, таких как изображения или статические HTML-страницы.
Рассмотрим пример, в котором в зависимости от запроса файлы будут
раздаваться из разных локальных каталогов: /data/www,
который содержит HTML-файлы, и /data/images,
содержащий файлы с изображениями.![]()
Во-первых, создайте каталог /data/www и положите в него файл index.html с любым текстовым содержанием, а также
создайте каталог /data/images и положите в него несколько
файлов с изображениями.
Далее, откройте конфигурационный файл.
Конфигурационный файл по умолчанию уже включает в себя несколько
примеров блока server, большей частью закомментированных.
Для нашей текущей задачи лучше закомментировать все такие блоки и
добавить новый блок
http {
    server {
    }
}
В общем случае конфигурационный файл может содержать несколько блоков server,
различаемых по портам, на
которых они
слушают,
и по
имени сервера.
Определив, какой server будет обрабатывать запрос,
nginx сравнивает URI, указанный в заголовке запроса, с параметрами директив location, определённых внутри блока server.
В блок server добавьте блок location следующего вида:
location / {
    root /data/www;
}
Этот блок location задаёт “/”
в качестве префикса, который сравнивается с URI из запроса.
Для подходящих запросов добавлением URI к пути, указанному в директиве
root,
то есть, в данном случае, к /data/www, получается
путь к запрашиваемому файлу в локальной файловой системе.
Если есть совпадение с несколькими блоками location,
nginx выбирает блок с самым длинным префиксом.
В блоке location выше указан самый короткий префикс,
длины один,
и поэтому этот блок будет использован, только если не будет совпадения
ни с одним из остальных блоков location.
Далее, добавьте второй блок
location /images/ {
    root /data;
}
Он будет давать совпадение с запросами, начинающимися с /images/ (location / для них тоже подходит, но указанный там префикс
короче).![]()
Итоговая конфигурация блока server должна выглядеть
следующим образом:
server {
    location / {
        root /data/www;
    }
    location /images/ {
        root /data;
    }
}
Это уже работающая конфигурация сервера, слушающего на стандартном порту 80
и доступного на локальном компьютере по адресу /images/,
сервер будет отправлять файлы из каталога /data/images.
Например, на запрос http://localhost/images/example.png nginx отправит
в ответ файл /data/images/example.png.
Если же этот файл не существует, nginx отправит ответ, указывающий на
ошибку 404.
Запросы, URI которых не начинаются на /images/, будут
отображены на каталог /data/www.
Например, в результате запроса http://localhost/some/example.html в ответ будет
отправлен файл /data/www/some/example..
Чтобы применить новую конфигурацию, запустите nginx, если он ещё не запущен,
или отправьте сигнал reload главному процессу nginx,
выполнив:
nginx -s reload
В случае если что-то работает не как ожидалось, можно попытаться выяснить причину с помощью файловaccess.logиerror.logиз каталога/usr/local/nginx/logsили/var/log/nginx.
Настройка простого прокси-сервера
Одним из частых применений nginx является использование его в качестве прокси-сервера, то есть сервера, который принимает запросы, перенаправляет их на проксируемые сервера, получает ответы от них и отправляет их клиенту.
Мы настроим базовый прокси-сервер, который будет обслуживать запросы
изображений из локального каталога и отправлять все остальные запросы на
проксируемый сервер.
В этом примере оба сервера будут работать в рамках одного
экземпляра nginx.
Во-первых, создайте проксируемый сервер, добавив ещё один блок server в конфигурационный файл nginx со следующим
содержимым:
server {
    listen 8080;
    root /data/up1;
    location / {
    }
}
Это будет простой сервер, слушающий на порту 8080
(ранее директива listen не указывалась, потому что
использовался стандартный порт 80) и отображающий все
запросы на каталог /data/up1 в локальной файловой
системе.
Создайте этот каталог и положите в него файл index.html.
Обратите внимание, что директива root помещена в контекст server.
Такая директива root будет использована, когда директива location, выбранная для выполнения запроса, не содержит
собственной директивы root.
Далее, используйте конфигурацию сервера из предыдущего раздела
и видоизмените её, превратив в конфигурацию прокси-сервера.
В первый блок location добавьте директиву
proxy_pass,
указав протокол, имя и порт проксируемого сервера в качестве параметра
(в нашем случае это http://localhost:8080):
server {
    location / {
        proxy_pass http://localhost:8080;
    }
    location /images/ {
        root /data;
    }
}
Мы изменим второй блок location, который на данный момент отображает запросы
с префиксом /images/ на файлы из каталога /data/images так, чтобы он подходил для запросов изображений
с типичными расширениями файлов. Изменённый блок
 location выглядит следующим образом:
location ~ \.(gif|jpg|png)$ {
    root /data/images;
}
Параметром является регулярное выражение, дающее совпадение со всеми
URI, оканчивающимися на .gif, .jpg или .png.
Регулярному выражению должен предшествовать символ ~.
Соответствующие запросы будут отображены на каталог /data/images.
Когда nginx выбирает блок location,
который будет обслуживать запрос, то вначале он проверяет
директивы location,
задающие префиксы, запоминая location с самым
длинным подходящим префиксом, а затем проверяет регулярные выражения.
Если есть совпадение с регулярным выражением, nginx выбирает соответствующий location, в противном случае берётся запомненный ранее location.
Итоговая конфигурация прокси-сервера выглядит следующим образом:
server {
    location / {
        proxy_pass http://localhost:8080/;
    }
    location ~ \. (gif|jpg|png)$ {
        root /data/images;
    }
}
(gif|jpg|png)$ {
root /data/images;
}
}
 (gif|jpg|png)$ {
root /data/images;
}
}
(gif|jpg|png)$ {
root /data/images;
}
}
Этот сервер будет фильтровать запросы, оканчивающиеся на .gif, .jpg или .png,
и отображать их на каталог /data/images (добавлением URI к
параметру директивы root) и перенаправлять все остальные
запросы на проксируемый сервер, сконфигурированный выше.
Чтобы применить новую конфигурацию, отправьте сигнал reload nginx’у, как описывалось в предыдущих разделах.
Существует множество других директив для дальнейшей настройки прокси-соединения.
Настройка проксирования FastCGI
nginx можно использовать для перенаправления запросов на FastCGI-серверы. На них могут исполняться приложения, созданные с использованием разнообразных фреймворков и языков программирования, например, PHP.
Базовая конфигурация nginx для работы с проксируемым FastCGI-сервером
включает в себя использование директивы
fastcgi_pass
вместо директивы proxy_pass,
и директив fastcgi_param
для настройки параметров, передаваемых FastCGI-серверу. Представьте, что FastCGI-сервер доступен по адресу
 localhost:9000.
Взяв за основу конфигурацию прокси-сервера из предыдущего раздела,
замените директиву proxy_pass на директиву fastcgi_pass и измените параметр на localhost:9000.
В PHP параметр SCRIPT_FILENAME используется для
определения имени скрипта, а в параметре QUERY_STRING передаются параметры запроса.
Получится следующая конфигурация:
server {
    location / {
        fastcgi_pass  localhost:9000;
        fastcgi_param SCRIPT_FILENAME $document_root$fastcgi_script_name;
        fastcgi_param QUERY_STRING    $query_string;
    }
    location ~ \.(gif|jpg|png)$ {
        root /data/images;
    }
}
Таким образом будет настроен сервер, который будет перенаправлять
все запросы, кроме запросов статических изображений, на проксируемый
сервер, работающий по адресу localhost:9000,
по протоколу FastCGI.
Related Utilities
See Also
DescriptionBlueScreenView scans all your minidump files created during ‘blue screen of death’ crashes, and displays the information about all crashes in one table. For each crash, BlueScreenView displays the minidump filename, the date/time of the crash, the basic crash information displayed in the blue screen (Bug Check Code and 4 parameters), and the details of the driver or module that possibly caused the crash (filename, product name, file description, and file version). For each crash displayed in the upper pane, you can view the details of the device drivers loaded during the crash in the lower pane. BlueScreenView also mark the drivers that their addresses found in the crash stack, so you can easily locate the suspected drivers that possibly caused the crash. Download links are on the bottom of this page Versions History
BlueScreenView Features
System Requirements
Using BlueScreenViewBlueScreenView doesn’t require any installation process or additional dll files. In order to start using it, simply run the executable file — BlueScreenView.exeAfter running BlueScreenView, it automatically scans your MiniDump folder and display all crash details in the upper pane. Crashes Information Columns (Upper Pane)
Drivers Information Columns (Lower Pane)
Lower Pane ModesCurrently, the lower pane has 4 different display modes. You can change the display mode of the lower pane from Options->Lower Pane Mode menu.
Crashes of Remote Network ComputerIf you have multiple computers on your network and you have full administrator access to them (e.g: you have access to \\ComputerName\c$), you can also view the crashes of the other computers on your network remotely. In order to do that, simply go to ‘Advanced Options’ (Ctrl+O) and type the MiniDump folder of the remote computer, for example: \\MyComp\c$\Windows\MiniDump.Notice: If you fail to get full administrator access to the remote computer, you should read the instructions in the following Blog post: How to connect a remote Windows 7/Vista/XP computer with NirSoft utilities. Watching the crashes of multiple computers on your networkIf you have a network with multiple computers, and you have full admin access to these computers, you can view the blue screens list of all these computers in one table, and easily detect computers with recurring BSOD problems. In order to use this feature, prepare a list of all computer names/IP addresses that you want to inspect, and save it to a simple text file.
The computer names in the list can be delimited by comma, semicolon, tab character, or Enter (CRLF). comp01 comp02 192.168.0.1 192.168.0.2 192.168.0.4After you have a text file contains the computers list, you can go to Advanced Options window (Ctrl+O), choose the second option and type the computers list filename. Command-Line Options
Translating BlueScreenView to other languagesIn order to translate BlueScreenView to other language, follow the instructions below:
LicenseThis utility is released as freeware. You are allowed to freely distribute this utility via floppy disk, CD-ROM, Internet, or in any other way, as long as you don’t charge anything for this. If you distribute this utility, you must include all files in the distribution package, without any modification !DisclaimerThe software is provided «AS IS» without any warranty, either expressed or implied, including, but not limited to, the implied warranties of merchantability and fitness for a particular purpose. The author will not be liable for any special, incidental, consequential or indirect damages due to loss of data or any other reason.FeedbackIf you have any problem, suggestion, comment, or you found a bug in my utility, you can send a message to nirsofer@yahoo.
BlueScreenView is also available in other languages. In order to change the language of BlueScreenView, download the appropriate language zip file, extract the ‘bluescreenview_lng.ini’, and put it in the same folder that you Installed BlueScreenView utility.
| ||||||||||||||||||||||||||||||||||||||||||||||||||||||||||||||||||||||||||||||||||||||||||||||||||||||||||||||||||||||||||||||||||||||||||||||||||||||||||||||||||||||||||||||||||||||||||||||||

 exe /stab «» > c:\temp\blue_screens.txt

 Also, the stack addresses list is currently not supported for 64-bit crashes.


 30
30:max_bytes(150000):strip_icc()/brackets-5a2af704da27150036827792.png) K. Lee(Wave)
K. Lee(Wave) 55
55Импорт данных из файла CSV, HTML или текстового файла
Excel для Microsoft 365 для Mac Excel 2021 для Mac Excel 2019 для Mac Excel 2016 для Mac Excel для Mac 2011 Больше…Меньше
В меню Файл выберите Импорт .
В диалоговом окне Импорт выберите тип файла, который вы хотите импортировать, а затем нажмите Импорт .
В диалоговом окне Выберите файл найдите и щелкните CSV-, HTML- или текстовый файл, который вы хотите использовать в качестве диапазона внешних данных, а затем щелкните Получить данные .
Следуйте инструкциям мастера импорта текста, где вы можете указать способ разделения текста на столбцы и другие параметры форматирования. По завершении шага 3 мастера нажмите Готово .
В диалоговом окне Импорт данных щелкните Свойства , чтобы задать определение запроса, управление обновлением и параметры макета данных для импортируемых внешних данных. Когда вы закончите, нажмите OK , чтобы вернуться в диалоговое окно Import Data .
Выполните одно из следующих действий:
от до | Сделай это |
Импорт данных на текущий лист | Щелкните Существующий лист , а затем щелкните OK . |
Импорт данных на новый лист | Щелкните Новый лист , а затем щелкните OK . Excel добавляет новый лист в книгу и автоматически вставляет диапазон внешних данных в левый верхний угол нового листа. |
Примечание. Вы можете изменить макет или свойства импортируемых данных в любое время. В меню Данные укажите Получить внешние данные , а затем щелкните Редактировать текстовый импорт или Свойства диапазона данных . Если вы выберете Edit Text Import , выберите исходный импортированный файл, а затем внесите изменения во внешние данные в мастере импорта текста. Выбрав Свойства диапазона данных , вы можете установить определение запроса, управление обновлением и параметры макета данных для внешних данных.
Импорт данных из базы данных
далеко | Приобретение.GOV
Полная загрузка FAR в различных форматах
| Номер FAC | Дата вступления в силу | HTML | ДИТА | ПДФ | Слово | EPub | Книги Apple | Разжечь |
|---|---|---|---|---|---|---|---|---|
| 2023-04 | 02.06.2023 |
| Детали/подчасти | HTML | ДИТА | Печать |
|---|---|---|---|
| Часть 1 – Система федеральных правил закупок | |||
Часть 2. Определения слов и терминов Определения слов и терминов | |||
| Часть 3. Ненадлежащая деловая практика и личные конфликты интересов | |||
| Часть 4 – Административные и информационные вопросы | |||
| Часть 5. Опубликование действий по контракту | |||
| Часть 6. Требования к конкурсу | |||
| Часть 7. Планирование приобретения | |||
Часть 8. Требуемые источники поставок и услуг Требуемые источники поставок и услуг | |||
| Часть 9. Квалификация подрядчика | |||
| Часть 10 — Исследование рынка | |||
| Часть 11. Описание потребностей агентства | |||
| Часть 12. Приобретение коммерческих продуктов и коммерческих услуг | |||
| Часть 13. Упрощенные процедуры приобретения | |||
| Часть 14 — Закрытые торги | |||
Часть 15. Заключение договора путем переговоров Заключение договора путем переговоров | |||
| Часть 16 — Типы договоров | |||
| Часть 17. Особые методы заключения договоров | |||
| Часть 18 — Приобретение в экстренных случаях | |||
| Часть 19. Программы для малого бизнеса | |||
| Часть 20 — зарезервировано | |||
| Часть 21 — зарезервировано | |||
Часть 22. Применение трудового законодательства к государственным закупкам Применение трудового законодательства к государственным закупкам | |||
| Часть 23. Окружающая среда, эффективное использование энергии и воды, технологии возобновляемых источников энергии, охрана труда и рабочее место без наркотиков | |||
| Часть 24. Защита конфиденциальности и свободы информации | |||
| Часть 25 — Приобретение за рубежом | |||
| Часть 26 — Другие социально-экономические программы | |||
Часть 27. Патенты, данные и авторские права Патенты, данные и авторские права | |||
| Часть 28 — Облигации и страхование | |||
| Часть 29 — Налоги | |||
| Часть 30. Администрирование стандартов учета затрат | |||
| Часть 31. Принципы и процедуры в отношении стоимости контракта | |||
| Часть 32. Финансирование по контракту | |||
| Часть 33 Протесты, споры и апелляции | |||
Часть 34. Приобретение основных систем Приобретение основных систем | |||
| Часть 35. Заключение контрактов на исследования и разработки | |||
| Часть 36. Строительные и инженерно-строительные контракты | |||
| Часть 37. Договор на оказание услуг | |||
| Часть 38. Федеральный график поставок | |||
| Часть 39 — Приобретение информационных технологий | |||
| Часть 40 — зарезервировано | |||
| Часть 41 — Приобретение коммунальных услуг | |||
Часть 42.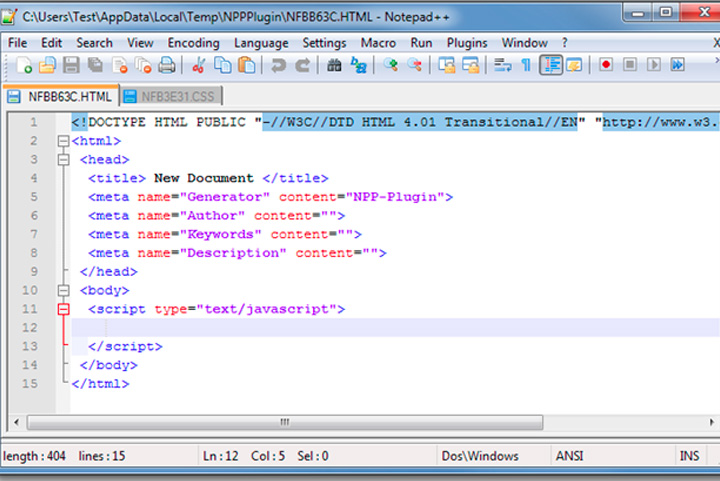 Администрирование контрактов и аудиторские услуги Администрирование контрактов и аудиторские услуги | |||
| Часть 43. Модификации контракта | |||
| Часть 44. Политика и процедуры субподряда | |||
| Часть 45 — Государственная собственность | |||
| Часть 46. Обеспечение качества | |||
| Часть 47 — Транспорт | |||
Часть 48. |